
At a Glance
With holidays around the corner, many people start planning out their Thanksgiving meal. Along with planning comes a little bit of stress and fear about overcooking the turkey while making the sides on time.
I’ll address multi-rack cooking for your side dishes in a separate article, but for now, I’m going to explain how to roast the perfect bird.
It’s pretty straightforward culinary-wise, but it does take some time to get right.
In this article, you will learn step-by-step how to achieve the perfect results for your turkey without the stress or hassle.
How to Roast the Perfect Turkey
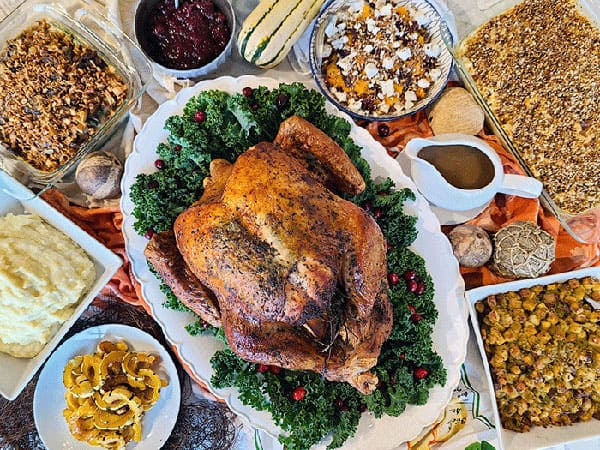 Holiday Meal Featuring Roasted Turkey Made in a Convection Oven at Yale Appliance
Let’s start with the prep. If you are lucky enough to get a fresh turkey, then less pre-planning is required.
However, most will be buying frozen turkeys, and if that’s the case, you need to thaw your turkey before you can begin prepping.
Also, make sure your turkey is not pre-seasoned, pre-salted, or self-basting.
Thawing will need to be done for a couple of days, depending on the bird’s size. The average defrosting time in your fridge is about 24 hours for every 5 pounds.
Alternatively, you can also thaw the turkey in a cold water bath, as long as the water is changed every 30 minutes to prevent bacteria from growing.
Lastly, if you have an extra-large capacity steam oven, you can use this to defrost your large turkey in a matter of a couple of hours. If you have a smaller bird, you can use a regular steam oven for defrosting as well.
Once your turkey is completely thawed out, give it a good rinse. Remove all the extras from the cavity like the giblets and neck, then pat it completely dry and prepare it for brining.
How to Brine Your Turkey
Traditionally, there are two ways to brine a turkey, wet brine or dry brine. I prefer the dry brine, which is essentially pre-salting and seasoning your turkey, but it requires extra time to infuse the herb into the meat.
This is the process of osmosis, where the salt pulls the moisture out of the meat, and then, if it sits long enough, it gets reabsorbed back in, with all the beautiful flavor of the herbs and other aromatics/seasoning.
The longer it sits like this, the better.
The wet brine method uses the same science; however, it’s a lot more involved, requires more fridge space for storage, and gets very messy. Plus, the skin remains wet, which prevents it from getting that beautiful crispy brown color.
For the dry brine, I recommend at least one tablespoon of Kosher salt per every 5-6 lbs of meat, plus a medley of herbs such as sage, rosemary, thyme, and freshly ground pepper.
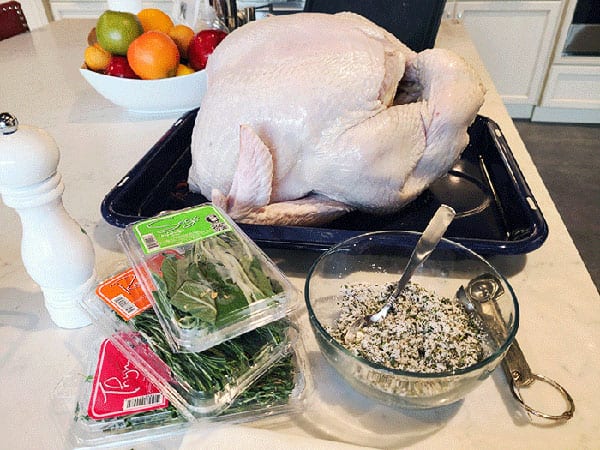 Seasoning Your Turkey With Sage, Thyme, Rosemary, and Ground Black Pepper
It’s very important to use Kosher salt over table salt.
Kosher salt is much coarser and can be absorbed slowly into the meat. Table salt is very fine and will end up getting absorbed too quickly. If table salt is all you have, then adjust your quantity accordingly. Think less is more.
You can also add some citrus zest into the brine for a little freshness or save it for the aromatics in the cavity.
Mix everything together and set it aside.
Next, separate the skin from the flesh in the turkey’s breast area and around the legs and thighs.
If you are having a hard time doing this by hand without breaking the skin, try using the handle of a wooden spoon.
Next, take the dry brine mixture and spread it evenly under the breast’s skin and the legs and thighs as best you can.
Afterward, take the remaining brine mixture and spread it evenly over the rest of the turkey from the bottom to the top and all around.
Make sure to tuck the wings back behind the breast to keep everything neat and tidy.
Most importantly, you should keep your turkey on a rack to prevent the bottom from sitting in any juices or liquid as it brines.
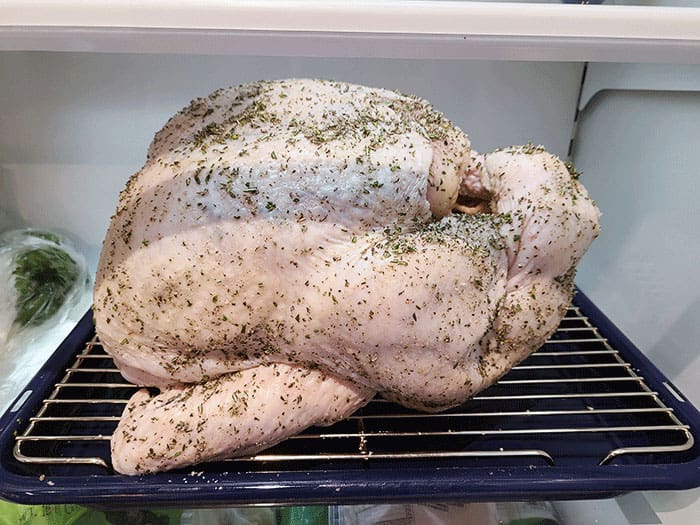 Placing your turkey on a pan with a rack is ideal for brining and roasting.
Place the turkey in your fridge, uncovered for at least a day, or up to 3 days for maximum flavor.
Keeping the bird uncovered ensures nice and crispy skin. This helps to dry it out gradually.
Before Placing Your Turkey in the Oven
On the day you will roast, remove the turkey from the fridge at least 1 hour before it’s going into the oven to take the chill off and get it close to room temperature.
You also want to make sure the oven racks are properly placed, remove the top 2 racks, and place the bottom rack into the lower third of the oven.
Now, preheat your oven to 500 F or 450 F on Convection Roast.
Before you place your turkey in the oven, measure a piece of foil that will fit just over the turkey breast, spray with cooking spray or coat with oil, and set aside.
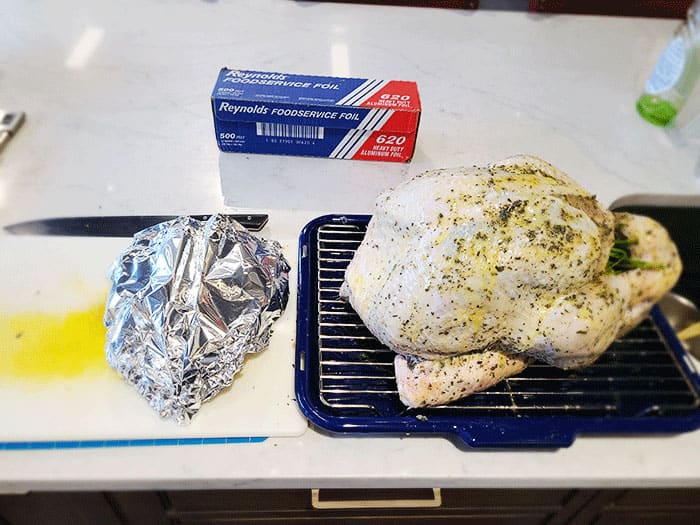 Tin Foil Tent for Roasting Your Turkey
Melt down one stick of butter, and fill the cavity with some aromatics. I used half a head of garlic, half an onion, half a lemon, and a whole medley of herbs like parsley, thyme, and rosemary.
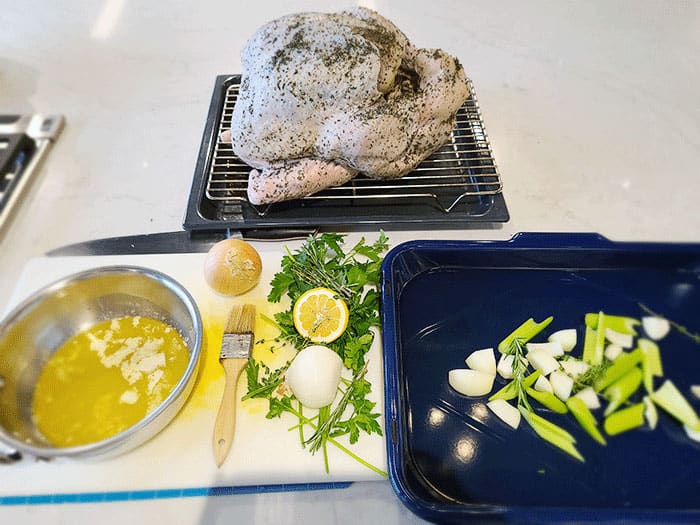 Aromatics for the Inside of Your Turkey
Once the butter has melted, use a pastry brush and thoroughly coat the entire outside of the bird evenly.
If you have an oven with a built-in temperature probe, place your temperature probe into the thickest part of the meat in the breast area, then plug it into your oven and program the probe to 165 F.
Don’t forget to truss the turkey. Use kitchen twine, and tie the legs together.
Roasting Your Turkey
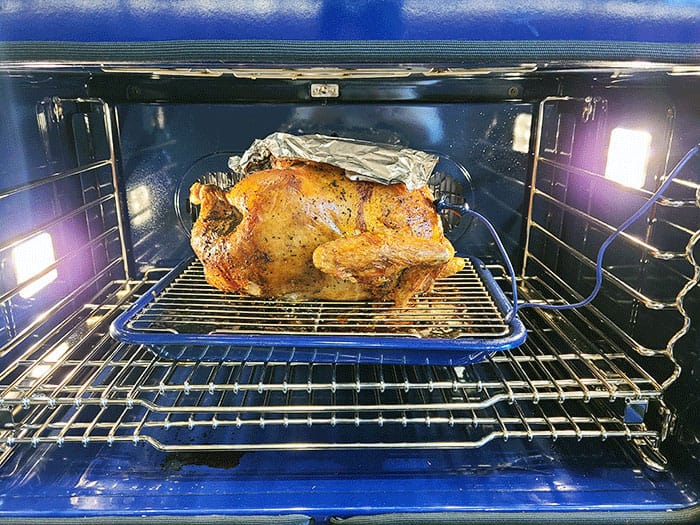
.jpg?width=799&name=placing-your-turkey-in-the-oven%20(1).jpg) Prepped Turkey in Oven With Temperature Probe Inserted
Prepped Turkey in Oven With Temperature Probe Inserted
Use a pan with a roasting rack or wire rack instead of a deep roasting pan. This will allow more air to circulate the turkey, cooking the bottom more evenly and quickly.
Now place your turkey in the oven at the high temperature (500 F/Convection Roast 450 F) setting for 30 minutes to “sear” the outside and lock in the juices.
After 30 minutes, drop the temperature to convection roast 325 F or 350 F, and place the foil tent on top of the breast.
 Tin Foil Tent Over Turkey Breast
Allow the turkey to finish roasting low and slow at this temperature for another couple of hours.
The approximate cook time is around 10-15 minutes for every pound of meat.
Key Takeaways
 Perfectly Roasted Turkey
Roasting the perfect Thanksgiving turkey shouldn’t be stressful or difficult.
If you prepare ahead of time and follow the steps, it will come together very easily.
Sourcing a good locally raised turkey will also ensure you have the best flavor.
This usually has to be pre-ordered from a special farm or your CSA. Make sure you have plenty of herbs, salt, fresh ground pepper, and those aromatics!
Once the turkey is cooking in the oven, it’s time to focus on the rest of the meal!
Frequently Asked Questions:
1. Is it better to roast a turkey covered or uncovered?
The first 30 minutes at 500 F/convection roast 450 F should be uncovered, then drop the temp to 350 F/convection roast 325 F with the breast only covered
2. How do I keep my turkey moist?
The brining will help keep your turkey moist. Also, searing it at the beginning will help lock all the moisture in.
3. How do you cook a turkey without drying it out?
Brining is the best method, also using a probe will ensure that your turkey cooks to temperature instead of having it overcook and dry out.
4. Should I roast my turkey at 325 or 350?
Start at 500 F/convection roast 450F, then drop to 350 F/convection roast 325 F
5. How long do I cook a turkey per pound?
Approximately 10-15 minutes per pound, it cooks a little faster if the turkey has been brined. I always recommend using a probe.
6. Should I put butter or oil on my turkey?
I prefer butter for flavor, but if you need it to be dairy-free, go with a neutral oil like canola or vegetable.
7. Why is my turkey always dry?
It’s very lean meat, with little fat. If it’s overcooked, it will dry out very easily.
8. Should I put water in the bottom of my turkey roasting pan?
No, this will create steam and will prevent it from getting crispy skin.
Additional Resources
Confused about Wall Ovens? Get the Yale Wall Oven Buying Guide with updated features, specs, and detailed profiles of the best brands like Miele, Wolf, Viking, Bosch, Thermador, and more. Over 800,000 people have read a Yale Guide.

Related Articles:
Why Should You Trust Us?
It seems that every appliance review has nothing but glowing comments about almost every product, yet you read customer reviews and they are almost universally bad.
We are here to fill in the disconnect. We'll give you the best features, and the drawbacks as well, including reliability based on over 37,000 calls performed by our service team just last year. Our goal is to give you ALL the information so you know what's right for you.
Please consider subscribing or adding to the conversation in the comments below. We appreciate you stopping by.
A Note About Pricing
Pricing on this blog is for reference only and may include time sensitive rebates. We make every attempt to provide accurate pricing at time of publishing. Please call the stores for most accurate price.